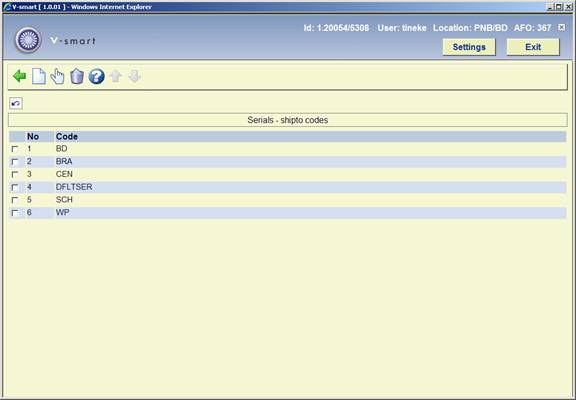
Shipto codes are defined within the Serials systems and are stored at the MetaInstitution for Serials level. The Ship to code is mandatory in a subscription and defines the location where the items for a subscription will be received. If you have five receiving locations for your serials, you set up five Ship to codes. If all of your serials are received centrally, only one Ship to code needs to be set up on your system. The Ship to code is instrumental in allowing receiving of multiple subscriptions (with differing shelfmarks) at the same time. You are allowed to add, update and delete ship to codes. It is not advisable to delete codes that are already in use by the system. After choosing this option an overview screen is displayed:
Each line in the grid represents a different SHIPTO code.
[I] – To add a new code. Please refer to section 367.5.1.
[*] – Select a code and then this option to modify code. Please refer to section 367.5.1.
[S*] – Select a code and then this option to delete an existing code. Do not delete codes that are already in use by the system.
After choosing the option

Code – Unique identifier assigned to this code. Cannot be changed once the code has been added to the system.
ShipTo Address – free text field. Can be left blank.
Chronology codes are used to determine how the publication date is displayed. For example, day, day of week, three character months, seasons, year, split year combination, quarters, etc.
After choosing this option an overview screen is displayed:
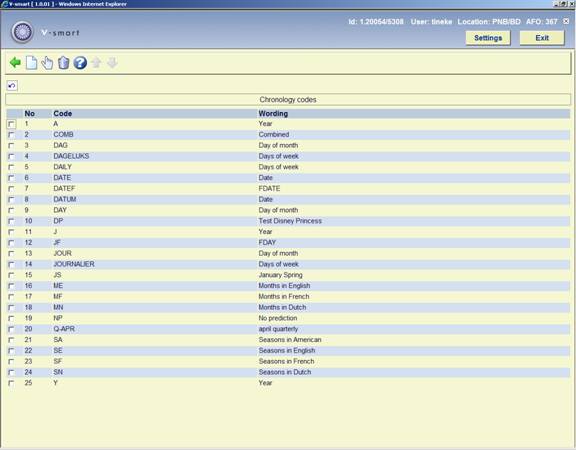
Each line in the grid represents a different Chronology code and consists of the Code and Wording assigned to the code.
[I] – To add a new code. Please refer to section 367.6.1.
[*] – Select a code and then this option to change an existing code. Please refer to section 367.6.1.
[S*] – Select a code and then this option to delete an existing code. Do not delete codes that are already in use by the system.
After choosing the option

Code – Unique identifier assigned to this code. Cannot be changed once the code has been added to the system.
Wording - Brief description in each language of the chronology code.
Type - this field is a dropdown list containing the entries from Authority list 4202
Date format - is a dropdown list of entries from Authority list 4203. This field is only used if you choose 0 – Date from the Type field. This field defines how you want the date to display in your chronology field.
Valid predictions - is used for Types 1- Months, 2 – Seasons and 5 – Day of week. For types 1 and 2, enter twelve predictions (separated by comma) corresponding to the twelve months of the year starting in January. For example, a valid Seasons entry for North America might include: Winter,Winter,Spring,Spring,Spring,Summer,Summer,Summer,Fall,Fall,Fall,Winter. When the system detects that an issue is expected in May, it will consult this list of valid predictions to determine that the correct chronology to display is Spring.
For type 5 – Day of week, enter seven predictions (separated by comma) corresponding to the seven days of the week beginning with Sunday.
Combined year format - is a dropdown list of entries from Authority list 4204 and is only valid if you chose Types 7 – combined year(previous/current) or 8 – combined year (current/next).Entries include: 0 - YYYY/YYYY, 1 - YYYY/YY and 2 - YY/YY.
Combined year separator - is used in conjunction with the previous field and defines the character that is used to separate the combined years. For example, if the Type was set to 7, Combined year format set to 0 - YYYY/YYYY and the Combined year separator set to “/”, a prediction for January 1, 2005 would result in a predicted chronology of 2004/2005.
Issue status codes are used to track the status of each issue and can be assigned to a serial item when it is checked in. For example, if a serials item has not been delivered in the expected time, your library can make a manual claim to the supplier by assigning the Claimed issue status code. Other examples of these codes are received, returned, in bindery, bound, missing, expected, not yet published, etc. These codes are also used to build summary holdings statements and to define what should be displayed to WebOpac users.
There are twenty-one Issue status codes; six are definable by the library. The user definable codes are numbered 15 through 20 and referred to as Optional 1 through Optional 6. Use these codes to define statuses such as Not published, In process, and so forth.
Codes may not be added or deleted from the list. You may only change the details of the code.
Possible statuses are:
- 1 – Received - The library has received an issue for this subscription. If you register receipt of an issue on a screen, the system automatically assigns this status to all active copies of the issues. The system prints a routing list slip if required.
- 2 – Returned - The library received this copy but then returned it to the supplier.
- 3 – Claimed - The library has created a claim for this copy. The system can automatically generate claims for late Expected and Item due copies. You can manually create a claim by assigning the Claimed status to a copy here. To remove the claim, assign a different status (such as Received or Missing) to the copy.
- 4 - Exp issue, 5 - Exp index, 6 - Exp suppl - The library expects receipt of one copy for every Type of Holding linked to every active subscription of the serial. The Exp statuses can only be assigned by the system, to issues that it has predicted. If you receive some copies of an issue but still expect the others, assign the Item due status to them.
- 7 – Missing - The library no longer expects receipt of this copy.
- 8 - In Bindery - The library has sent this received copy to be bound.
- 9 – Bound - This received copy has been bound.
- 10 - No action - The system removes this copy line from the issue definition when you return to the Receiving screen. This status can be assigned at any time. For example, if you get 5 copies of an issue of a 4-subscription serial, you would Receive the first 4 of them against the supplied issue. In addition, you could use the Insert after issue icon to create an extra issue box with the same enumeration and chronology as the original issue box, and then Receive the 5th copy against 1 of the subscriptions and set the other 3 copy lines to No action. The original issue would show the summary status Received 4/4; the inserted issue would show the summary status Received 1/1. You might also use the No action status if you discover you have claimed issues that will never be published.
-
11 - Item due - The library expects receipt of this copy. This status is more or less equivalent to the Exp status. Use this status when you do not receive all the expected copies of an issue and do not want to mark the remainder as Claimed or Missing. The system automatically assigns this status to any issues with a status Expected that are below the issue that you receive. The system automatically generates claims for late Expected and Item due copies.
You can also use this status when you have accidentally received an issue you should not – yet- have received (because you cannot manually assign a status of 'expected item').
- 12 – Withdrawn - This received copy is withdrawn.
- 13 – Microfilm, 14 – Microfiche - Use these statuses to denote that the library has holdings on microfilm or microfiche. First delete all receipts boxes for the paper issues that were transferred to microfilm or microfiche. Then use the icon to insert a new issue. In the Numbering field enter enough information to identify the microfilm or microfiche (i.e. 1993-1994). Make sure you assign a status of Microfilm or Microfiche.
- 15 - 20 — Optional 1-6 - Library definable. The system administrator can define statuses such as Not published, In process, and so forth in section 367.2.6 – Issue status codes.
- 21 - Not expected - The part is not expected by the subscriptions at the selected SHIPTO location.
- 22 – No receipt – This status is used to add retrospective receipts, e.g. as part of a conversion from another system. We advise you to not assign this status manually
Note
Issue statuses that are picked up by the claim cycle are:
3 – claim
4,5,6 – next expected
11 – item due
This is not configurable.
After choosing this option an overview screen is displayed:

Each line in the grid represents a different Issue status code and consists of the Code and Wording assigned to the code.
- Select a status code and click on this option to display the code's details. The following input form is displayed:

Wording– the wording for this status code in each language.
Suppress display in OPAC – if set, do not show issues with this status to users in the WebOpac. For example, you may not want to show the public claimed issues. This field does not affect the display of the summary holdings statement to the WebOpac user, nor the display of parts information in other modules of the system.
Treat items as ‘received' in Serials – determines whether items with this status code will be regarded as Received when the serials Receiving screen is displayed. Allows you to specify that items with status of Received, In bindery, Bound, and so forth, have really been received by the library. The message Received xx/yy on the serials Receiving screen will reflect this.
If not set, item has not been received. Displays as not received on the serials Receiving screen. The actual status may be Item due, Claimed, Returned, or Missing.
If set, consider this item as received by library and display as received on the serials Receiving screen. Allows you to assign an implied status of received though the actual status is Bound.
Treat items as gaps in Holdings displays – Determines whether or not items with this status code will be treated as non-gap or gap breaks in holdings statements. Corresponds to the USMARC Holdings fields 863/4/5 $w. This parameter has an effect only if Treat items as Held in Holdings display? is not set.
If not set and the item is not treated as held by the library, the exported MARC record containing the location's holdings will be built showing a non-gap break (tag 863/4 subfield w is assigned a value n for a non-gap indicator). For example, a status code representing unpublished parts. Holdings statements will be built with a ; (semicolon – a non-gap break) to indicate that this item is not held by the library. If set and the item is not treated as held by the library, the exported MARC record containing the location's holdings will be built showing a gap break (tag 863/864 subfield w is assigned a value g for a gap indicator). For example, a status code representing withdrawn parts. Holdings statements will be built with a , (comma – a gap break) to indicate that this item is not held by the library.
Treat items as held in Holdings displays - If not set, the exported MARC record containing the location's holdings will be built showing either a non-gap or gap break (tag 863/4 subfield w is assigned a value of n or g respectively). As well, summary holdings statements (built according to the MARC21 standard) will display a non-gap break using a “;” (semicolon) and a gap break using a “,” (comma). For example: v.1:no1(1976:Jan.)-v.1:no.4(1976:Apr.),v.1:no.6(1976:June),v.1:no.8(1976:Aug.)-v.1:no.10(1976:Oct.)
The library holds neither v.1:no.5(1976:May) nor v.1:no.7(1976:July).
Include on WebOpac holdings display: This setting allows libraries who want to display unbarcoded issues on the WebOpac holdings display to include only those issues with specific statuses. i.e. Received, Bound, etc.
In the case of a library wanting to show only barcoded issues on the Holdings display, no action is required. In the case of a library using Stack requests, the flag should be set for each status that stack requests can be placed against. i.e. if the library allows stack requests to be placed against unbarcoded issues with a status of Received, set the flag in the Received issue status record.
Note
The Holdings display will always show barcoded issues, regardless of the settings in AFO367 - Issue status codes.
Numbering codes are used to define whether an enumeration level has continuous numbering or should be reset when the level numbering changes.
After choosing this option an overview screen is displayed:

Each line in the grid represents a different Numbering code and consists of the Code and Wording assigned to the code.
[I] – To add a new code. Please refer to section 367.8.1.
[*] – Select a code and then this option to change an existing code. Please refer to section 367.8.1.
[S*] – Select a code and then this option to delete an existing code. Do not delete codes that are already in use by the system.
After choosing the option

Code – Unique identifier assigned to this code. Cannot be changed once the code has been added to the system.
Wording - Brief description in each language of the numbering code.
Type – choose from:
· Continuous numbering – choose this entry if numbering is continuous. A publication with 12 issues in a volume and continuous numbering will increment the volume numbering after 12 issues and keep increasing the issue numbering. For example, v.25:no.12 is followed by v.26:no.13 and then v.26:no:14.
· Reset numbering – choose this entry if numbering should reset/restart at 1 when the higher level of enumeration increases. For example, v.25:no.12 is followed by v.26:iss.1 and then v.26:no.2.
Note
Changing the Type once a code is in use by the system will affect the numbering of predicted issues.
Enumeration codes are used to define the format of the numbering found in an enumeration level. Examples of different formats are numeric, alphabetic, roman numerals and free text..
After choosing this option an overview screen is displayed:
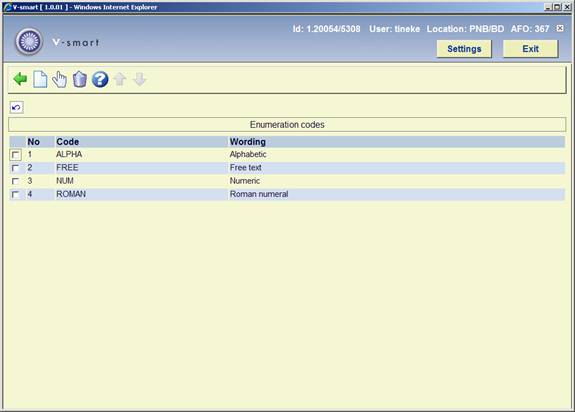
Each line in the grid represents a different Enumeration code and consists of the Code and Wording assigned to the code.
[I] – To add a new code. Please refer to section 367.9.1.
[*] – Select a code and then this option to change an existing code. Please refer to section 367.9.1.
[S*] – Select a code and then this option to delete an existing code. Do not delete codes that are already in use by the system.
After choosing the option

Code – Unique identifier assigned to this code. Cannot be changed once the code has been added to the system.
Wording - Brief description in each language of the enumeration code.
Type - choose from:
· Numeric – choose this entry if the numbering of the publication is numeric (i.e. 5, 25, 35, etc).
· Alphabetic – choose this entry if the numbering of the publication is alphabetic (i.e. predictions of A through Z).
· Roman numeral – choose this entry if the numbering of the publication is a roman numeral ( i.e. CIX).
· Free text – choose this entry to place a constant in the numbering of the publication.
Note
Changing the Type once a code is in use by the system will affect the numbering of predicted issues.
After choosing this option the following input form will be displayed:

Allow decentralized (location-specific) print layouts and printing for claims: – if checked, you can define different sets of claim print layouts for each location within your serials metainstitution. You would then generate and print claims (AFO 351/2/3) for each location within your serials metainstitution separately.
If not checked, you create one set of claim print layouts and these layouts are used for all claim printing within your serials metainstitution. When you run
AFO 351/2/3, claims for all locations within your serials metainstitution are processed.
The location of a claim is determined by the location in the shelfmark of the subscription.
Suppress claiming for indexes: if checked no claims will be generated for items that have “Index” as their Type of Holding rather than “Issues” or “Supplements”.
Suppress claiming for supplements: if checked no claims will be generated for items that have “Supplement” as their Type of Holding rather than “Issues” or “Index”.
Override password(s) to allow the deletion of all the receipt information: The delete receipt option in AFO 311 is password controlled when deleting multiple receipts to prevent accidental deletion of all receipts. If you select more than one of the received, missing, claimed (all but expected) issues and attempt to delete them a warning message will appear. Next you will be asked for the password to confirm deletion. One issue at a time does not need a password.
Override password(s) to delete serial receipt information when barcoded items are deleted: In AFO111/121/423 - The message 'Do you want to delete the receipt information?' appears when deleting an item (barcode) that was received through Serials Control. When you define one or more passwords here, there will be a prompt for a password when attempting to delete such items.
Automatically allow circulation of previous issue when next issue is received : If this parameter is turned off, the system functions as in previous releases.
If this parameter is turned on, the system allows the user to enter a ‘Pending item category' when adding items through Serials receiving. If the Item category of the newly created item is a ‘non-circulating' type, the system stores this Pending item category in the item. When the next serial issue for the subscription is received, the system will automatically update the Item category of the previously barcoded item with the Pending item category. The latest barcoded serial issue is kept out of circulation until the next issue is received. This parameter is set for each Serials metaInstitution.
Creation of citations – destination for Title: Enter the tag/subfield in the new citation record that should receive the contents of the !Title profile from the main title. This information is not defaulted into the bibliographic record if you link to an existing bibliographic record.
Creation of citations – destination for Numbering: Enter the tag/subfield in the new citation record that should receive the contents of the Numbering information from the serial issue. This information is not defaulted into the bibliographic record if you link to an existing bibliographic record.
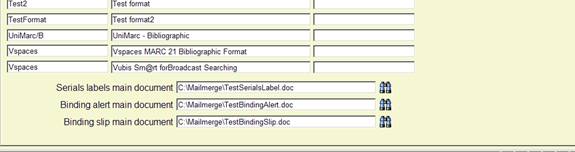
Serials labels main document: Enter the name of the main document that must be used for printing labels of individual issues. See the help of AFO 354 and the general help on mailmerging for more information.
Binding alert main document: Enter the name of the main document that must be used for printing binding alerts. See the help of AFO 321 (binding) and the general help on mailmerging for more information.
Binding slip main document: Enter the name of the main document that must be used for printing binding slips. See the help of AFO 321 (binding) and the general help on mailmerging for more information.
Use this option to rebuild all subscription indexes for all Meta institutions for Serials in the system. Subscription indexes include the Subscription number index, Alternate subscription number index and the index containing supplier reference numbers (both at the subscription and type of holding level).
This option allows for the maintenance (add, delete, modify, copy) of publication pattern templates. You can also add templates to the system by using the option "Save as template" when defining a serials publication pattern in AFO 321 (see the help for this AFO for more information).
These templates appear in a dropdown list when you are defining a new type of holding for a subscription in AFO 321.
After choosing this menu option an overview screen will be displayed:

After installation this will contain various templates. But you are free to delete these and create your own.
: Choose this option to define a new code. See section 367.12.1.
: Select a code and choose this option to modify the properties. See section 367.12.2.
: Select a code and choose this option to delete the code. The system will prompt for confirmation.
: Select a code and choose this option to create a new code based on settings of the selected code.
: Choose this option to define a new code. An input form will be displayed:
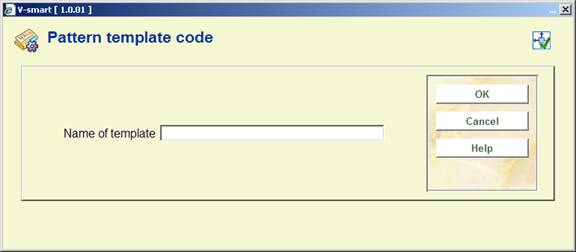
Enter a unique code and click , an input form will be displayed:
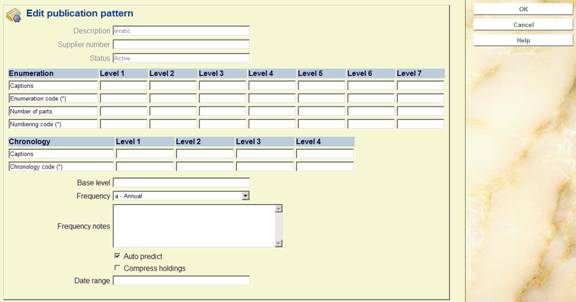
See the help for AFO 321 on Modifying Holding type and General groups for a full explanation of this screen.
: Select a code and choose this option to modify the properties. An overview screen will be displayed:

See the section on Publication pattern detail in the help for AFO 321 for an explanation of this screen.
Note
Not all options that are available in AFO 321 are available here.
This option allows the user to change the settings of the punctuation for both MARC21 and UNIMARC as well as set the parameter, “Force non-gap breaks between volumes in uncompressed holdings statements”. There will also be a warning on this form that the system-generated holdings statements will need to be rebuilt. The standard setting for each field will be shown in brackets.
After selecting this option, the following form will be displayed:

Punctuation settings: , the user will be able to enter one or more characters. It is important to realise that the standards for punctuation allow only one character (see Z39.71 and ISO10324 for more information).
For example:
Vol.1:Iss.3:Pt.1(2005:Jan)
^ ^
^ ^
| |
| enum/chron right separator
| |
enum/chron left separator
| subsequent level separator
1st and 2nd level separator
Vol.1:Iss.3(2005:Mar),Vol.1:Iss.6(2005:June)
^
Gap break (missing issue)
Vol.1:Iss.6(2005:June)-Vol.1:Iss.9(2005:Sep)
^
Open range indicator
Vol.1:Iss.3(2005:Mar);Vol.1:Iss.5(2005:May)
^
Non-gap break (missing issue was not published)
Force non-gap breaks: With this parameter turned off, uncompressed holdings statements will be built using the Data element separator. For Example,
If you have volumes 1, 2 and 3, the system will build the holdings statement as
v.1 v.2 v.3 (the data element separator (“ “) is used to separate the volumes.
When this parameter is turned on, the system is forced to use the non-gap break separator between the volumes (v.1;v.2;v.3)
Create gaps for implied missing volumes: With this parameter turned off, holdings statements for non-subscription volumes are built based on the list of volumes that appear on the system. Volumes that are not held by the library should be added to the list of volumes even though they are not received. If the holding consist of volumes 1 through 6 and volume 9, this will be displayed as "1 - 9" suggesting that also volumes 7 and 8 are held for this shelfmark.
When this parameter is turned on and the enumeration of a volume is numeric, the system will create gaps in the holdings statement when it finds non-sequential holdings. If the holdings consist of volumes 1 through 6 and volume 9, this will be displayed as "1 - 6 , 9".
Please note
After changing punctuation settings you must generate the holdings staements again (see below).
This option rebuilds all of the system-generated holdings in the system. After selecting this option, the standard form for scheduling processes will be presented.
Please note
This option must be run after changing punctuation settings (see above).
· Document control - Change History
|
Version |
Date |
Change description |
Author |
|
|
1.0 |
July 2008 |
creation |
|
|
|
1.1 |
August 2008 |
new option for (non)circulating issues; new options for punctuation and WebOpac display |
|
|
|
2.0 |
January 2009 |
new option for label printing; new punctuation parameter |
|
|
|
3.0 |
August 2009 |
new mandatory fields; new deletion password for barcoded items; explanation of all field definitions; new options for binding |
|
|
|
4.0 |
July 2010 |
New flag on form for issue status codes; changed info for some fields due to new AFO 279; more on issue status codes |
|
|